Dashboard #2 - Advanced [ Script]
After going through the basics in prior video, you will learn here more advanced controls
This video concludes with a hands-on use-case of running a test in the classroom
Video (7 mins)
Related Videos
Script
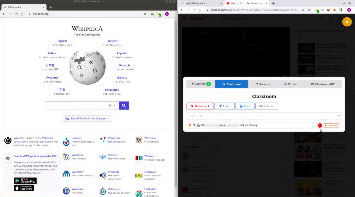
Welcome to the second and last video on the ClassroomAPP dashboard.

This is where things become even more interesting.

As we did before, we divide our screen into teacher on the right, and student on the left.

Let's go ahead and connect our classroom.

Notice how, with the dashboard closed, the messages still appear.

How you'd normally work, is that you'd be doing your teaching and instruction.

Then you open the dashboard, to quickly see what's happening in your classroom.

And then close and return to your teaching.

If a student leaves, you get a notification even if the dashboard is closed.
You can then open it up to get more information.

This is how we recommend you use the dashboard.
You simply open it when needed, and close when done, as you know you'll be notified as things happen.

Let's bring the student back so we can continue with the video.

The next thing I'd like to cover today is the list of websites you see in your classroom panel.

This list contains the most recent websites you've visited.

So let's say I open up a new website.

If I return to my dash, you should notice that the list has refreshed itself.

The most recent is Wikipedia, which makes sense.
This is where I am right now.

Second most recent is the BBC which I just opened.

As soon as the list gets too long, it shows the top 20 of your most recent websites.

Let's say I'd like to force a page. I want all my students to get back onto Wikipedia.

I click on force, and it updates the students by activating or opening Wikipedia.

Notice something interesting, it didn't go to my exact page. I'm at the arts page.

It went to the current Wikipedia page the student is visiting.

This is done on purpose. If your students are working, you don't want to force them back to the starting page.

ClassroomAPP first searches for the closest page before it opens a new tab.

What if I want them to be exactly on that page, not a similar one.

You would hold the force or lock button for 2 seconds.

It did something else too. It put the student in full screen, which is on purpose as well.

ClassroomAPP figured. Now this is important, I need to get the students' attention onto that page.

Let’s now summarize the classroom panel.

First, the global buttons are meant to force or lock everyone in your classroom.

While individual buttons relate to a student in question.

Second, if you just click once, it opens the closest page to what you're forcing.

If you want to lock or force the student onto the exact page, you do a long press.

This works on both the global and individual controls.

We are now done with the classroom panel.

Next are the filters.

First, ClassroomAPP, by default, always blocks bad sites, such as pornography and malware, regardless of your filters.

The term black list comes from web filter terminology, it's a list of sites that are not allowed.
So they're blacklisted so to speak.

The white lists are the opposite, it’s a list of sites that are always allowed.

Let's go through an example. Say I wanted to only allow this page, but I would like to block all the other Wikipedia pages.

I would white list the arts page.

And then add a new black list item and edit it as wikipedia.

The filter, whether white or blacklist, looks for the word in the address of the page students are loading.
So it doesn't have to be precise.

The order is this. It checks first if a page is allowed. If so, it allows it.

If it does not find it in the white list, it moves onto the black list.

If the site matches the blacklist it gets blocked.

Back to our example. Right now I'm only allowing the arts page.

If a student loads anything else on wikipedia, it blocks it.

If you would like to save websites for future use, you just click on the save button, and it'll be saved to your profile.

Black and white lists however, are temporary for the current session.

What if I want to a smart block. For instance, any website with the word wiki in it.

I just add wiki as a filter.

And right away, the students would see an immediate block.

Let's go through a practical application.

It's time to run an in-classroom test.

You can use Google classroom or any testing app. But you can also use the built-in testing engine in ClassroomAPP.

I open up the App.

go to my courses.

then the sample test.

I then lock the student into the test.

You have the handy dashboard shortcuts at the bottom of the App.

Now they're locked into the testing page.

They are in full screen and can’t leave to focus on their tests.

Let's say one student is done with the test, while other students are still working on their answers.

I can come here and unlock that student only.

That's the strength of individual controls, you can unlock students as they finish their tasks.
Or do the opposite, lock specific students that you really need to guide on task.

ClassroomAPP was designed for differentiated instruction in your classroom.

That's it for this advanced dashboard video. I hope you found these features to be handy in your classroom.
We'd love to hear from you if you have feedback or ideas of features we should add.

Much of what you have seen in this video came from teacher comments, which we always take to heart.

You can now move on to other related videos, which cover the built-in application for more advanced use cases.

Thank you so much for tuning in.